How to Choose the Best Studio Monitors for Your Needs

Studio monitors perform the important role of converting an audio signal into sound and are used by almost every professional involved with music with the exception of performers. Those help to record and finalize the tracks, making sure that in every type of sound playback the final product sounds appropriate.
Choosing the most appropriate studio monitor is a key element ensuring the accuracy and understanding of the audio being produced. The selection depends on various aspects such as the dimension of your studio, the amount you are willing to spend and the type of music that you make. Having the correct monitor will enhance significantly your capacity to make good quality sound material.
Understanding Studio Monitors
The design and function of studio monitors are what separates them from normal speakers. This is because, thanks to specific design requirements, they will deliver every tone equally well, resulting in a neutral response which allows for better sound evaluation. This is especially important during critical listening and when checking if the mixes work on various playback systems.
Key Features:
- Frequency response: This refers to the range of frequencies a monitor can reproduce. A flat frequency response is ideal for accurate monitoring.
- Accuracy and flatness: These are essential qualities that ensure the monitor faithfully reproduces the original audio signal without coloration or distortion.
- Build quality and design: The construction and design of a studio monitor impact its durability, sound quality, and overall performance.
- Driver Configuration: Monitors typically have one or more drivers (woofers, tweeters, etc.) that handle different frequency ranges. Look for monitors with well-matched drivers for balanced sound reproduction.
- Room Compensation Controls: Some monitors offer controls to adjust the frequency response based on your room’s acoustics, helping to fine-tune the sound.
- Power Handling: This refers to the maximum power the monitor can handle without distortion. Higher power handling can support louder volumes and more dynamic range.
- Crossover Frequency: This is the point at which the audio signal is divided between different drivers. A well-designed crossover ensures smooth integration between drivers.
- Input Options: The variety of inputs (XLR, TRS, RCA) can affect how easily you can connect the monitors to your audio interface and other equipment.
- Frequency Range: The range of frequencies a monitor can reproduce, from low bass to high treble. A wider frequency range can provide more detailed sound.
- Soundstage and Imaging: The ability of the monitors to create a precise and spacious soundstage, allowing you to place and track audio elements accurately in the mix.
- Phase Response: Good phase response ensures that all frequencies arrive at the listener’s ears at the same time, which helps in accurate sound reproduction.
- Port Design: The design of the bass ports (front or rear) can affect the low-frequency response and placement flexibility of the monitors.
- Isolation Features: Features like rubber feet or isolation pads help to minimize vibrations and resonance, ensuring cleaner sound.
- Build Material: The material used in the cabinet construction can affect the monitor’s resonance and overall sound quality. Look for well-constructed cabinets with materials that reduce unwanted vibrations.
Types of Studio Monitors
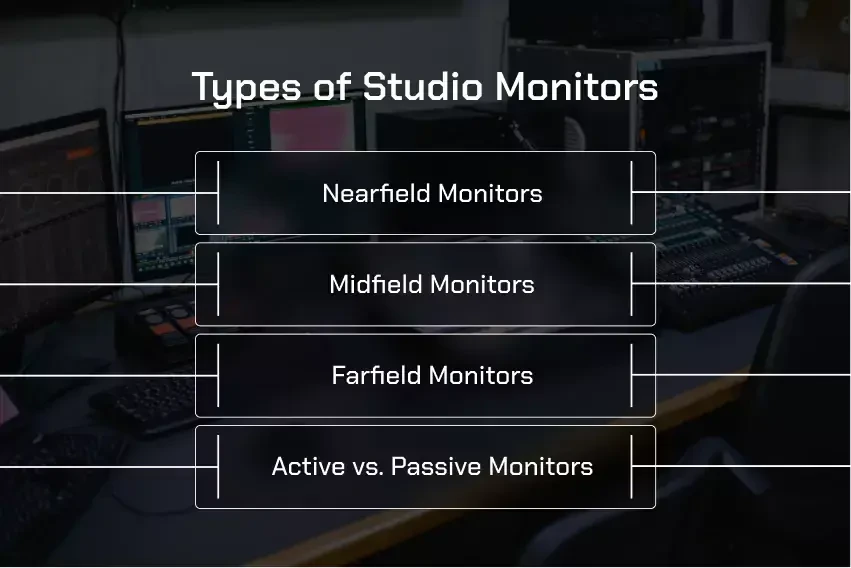
Nearfield Monitors:
Characteristics: Compact in size, designed for close listening distances (typically 2-3 feet).
Advantages: Ideal for small studios, affordable, and offer a more intimate listening experience.
Ideal use cases: Home studios, music production, and mixing.
Midfield Monitors:
Characteristics: Larger than nearfield monitors, designed for medium listening distances (typically 4-6 feet).
Advantages: Offer a more spacious soundstage and can handle higher volume levels.
Ideal use cases: Larger studios, mastering, and critical listening.
Farfield Monitors:
Characteristics: Largest type of studio monitor, designed for long listening distances (typically 8-10 feet).
Advantages: Provide a wide soundstage and can handle high SPL levels.
Ideal use cases: Large studios, live sound engineering, and film mixing.
Active vs. Passive Monitors:
Definitions: A perfect example is active monitors that come with a built-in amplifier and passive monitors that do not have amplifiers built within.
Pros and cons of each: Active monitors provide an ease of use and a certain degree of operational surface while passive monitors afford options in regards to the pieces of amplification employed.
Situations where one might be preferred over the other: Due to the simplicity embedded in the two although offered by the active monitors, passive monitors often comes as the second choice in home studios, active monitors are usually the go-to.
Key Considerations When Choosing Studio Monitors
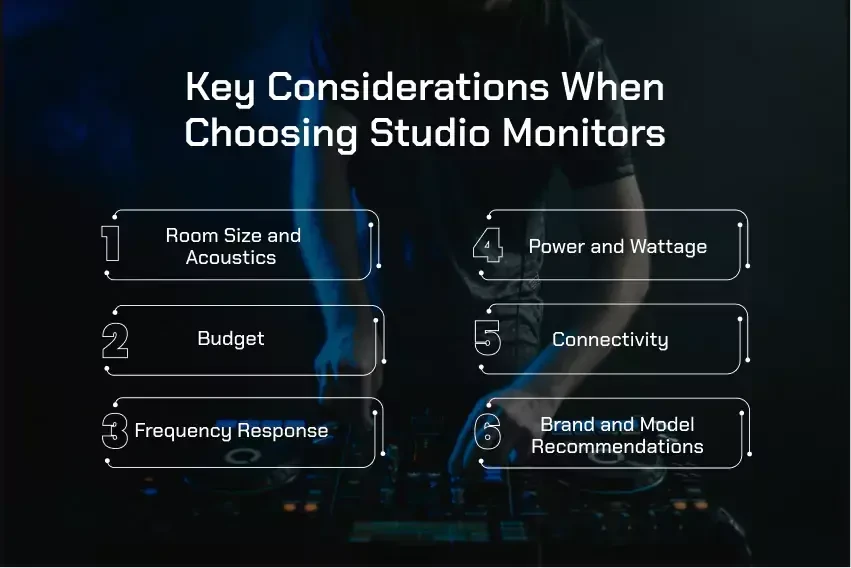
Room Size and Acoustics:
- Impact on monitor choice: It is interesting to note that the size of your studio room is a dominant factor when selecting the monitor. Large rooms would help take in midfield or farfield monitors and not so large rooms would do better with nearfield monitors.
- Importance of acoustic treatment: Acoustics in the room are highly dependent in how monitors acoustically perform. Therefore, acoustic treatments help in controlling excess reflections and other coloration so that a better picture can be drawn.
Budget:
- How to balance cost with quality: It is crucial to balance cost with quality when seeking to choose studio monitors. Costlier models will usually poduk performers of higher order; it is critical that a price is set and monitors within that range are sourced.
- Understanding what you get for different price ranges: Reasonably priced equipment is combined with more expensive equipment in great price ranges. Try and find as thoroughly as models possible twin at best price ever.
Frequency Response:
- Importance of a flat frequency response: For precise monitoring, it is difficult to work without a flat frequency response. This allows totality of reproduction so that there are no phases destroyed as a result of overhang.
- How to interpret frequency response specifications: Frequency response specifications are useful in evaluating the quality of a monitor. Search for monitors which have a wide range of frequency response and have a straighter response curve.
Power and Wattage:
- Understanding power requirements: To find out the power output of a monitor, it is measured in watts. Monitors with higher wattage will be able to sustain more obnoxious sounds and will fit into bigger rooms or applications that need high SPL.
- Matching power with room size and listening distance: When it comes down to the selection of a monitor with the applicable power rating, whether a lor at ion, take into consideration the size of your room and your usual listening distance.
Connectivity:
- Types of inputs (XLR, TRS, RCA): Studio monitors usually feature various inputs XLR, TRS, and RCA among others. Make sure that the selected monitor has the required inputs to be connected with the audio interface or to other devices.
- Importance of connectivity options: Possession of different connectivity types enhances the usability and compatibility to various audio sources.
Brand and Model Recommendations:
- Overview of popular brands: There are many notable manufacturers competent in the production of good studio monitors like Yamaha, Adam Audio, Genelec, JBL among others.
- Comparison of highly-rated models: From the different feedbacks search and analyze the known applicable models in the budget line to establish which will best suit your needs.
Testing and Evaluating Monitors
Listening Tests:
- How to perform a listening test:
Conduct listening tests in a quiet environment to accurately assess the sound quality of the monitors. Use familiar audio material and listen for clarity, accuracy, and overall balance.
- What to listen for (clarity, accuracy, etc.):
Pay attention to factors such as clarity of detail, accuracy of frequency response, and the overall soundstage.
Practical Considerations:
- Placement and positioning in your studio:
Proper placement and positioning are crucial for optimal sound quality. Experiment with different locations to find the best spot for your monitors in your studio.
- Compatibility with your existing equipment:
Ensure that the chosen monitors are compatible with your audio interface, amplifier, and other equipment in your setup.
Additional Tips and Tricks
Avoiding Common Mistakes:
- Avoid common mistakes such as buying monitors that are too large or too small for your room, neglecting acoustic treatment, and not considering the long-term implications of your choice.
Upgrading Your Monitors:
- If you find that your current monitors are no longer meeting your needs, it may be time to consider an upgrade. This might be due to changes in your production goals or the need for improved sound quality.
- Evaluate your current monitors based on factors such as frequency response, clarity, and overall performance. If they are no longer providing the level of accuracy and detail you require, it may be time for an upgrade.
Conclusion
Selecting the right studio monitors is a crucial investment for achieving high-quality audio production. When choosing monitors, it’s essential to consider factors such as the size of your studio, your budget, and your specific audio needs.
Pay close attention to key features like frequency response, accuracy, and build quality. Conduct thorough listening tests to evaluate how the monitors perform in your environment, and consider practical aspects like placement, acoustic treatment, and compatibility with your existing equipment.
Carefully assessing your needs and preferences will help ensure that your chosen monitors will meet your requirements and enhance your production work.
For expert insights and guidance, check out JBZ Beats before choosing the best studio monitors for mixing and explore their list of the best studio monitors under 1000. Their expert reviews will help you make the best choice for your studio setup.


Comments
Post a Comment